Help & Support
- Zipped folders MUST be unzipped. Some Windows operating systems allow you to peek inside a zipped folder. This does not mean it is actually unzipped.
Windows 10
- Unzip the folder containing the fonts first. Fonts cannot be installed if they are zipped.
- Right click on the font file and select Install.
OR
- Search for Fonts in the search box by the start menu.
- Click on the Fonts (Control Panel) link to open the Fonts Manager
- Drag and Drop or Copy and Paste the unzipped fonts into the Fonts Manager to install.
Windows 8
- Unzip the folder containing the fonts first. Fonts cannot be installed if they are zipped.
- Right click on the font file and select Install.
OR
- Go to search in the start menu.
- Search for Fonts in settings.
- Click on the Fonts Folder to open the Font folder.
- Drag and Drop or Copy and Paste the unzipped fonts files into the Fonts folder to install.
Windows 7
- Unzip the fonts first. Fonts cannot be installed if they are zipped.
- Right click the font file and select ‘Install.’
Windows Vista
- Unzip the fonts first. Fonts cannot be installed if they are zipped.
- From the ‘Start’ menu select ‘Control Panel.’
- Then select ‘Appearance and Personalization.’
- Then click on ‘Fonts.’
- Click ‘File’, and then click ‘Install New Font.’
- If you don’t see the File menu, press ‘ALT’.
- Navigate to the folder that contains the fonts you want to install.
- Select the fonts you want to install.
- Press the ‘Install’ button to install the fonts.
Windows XP
- Unzip the fonts first. Fonts cannot be installed if they are zipped.
- From the ‘Start’ menu select ‘Control Panel.’
- Select the ‘Appearance and Themes’ category.
- Select ‘Fonts’ from the ‘See Also’ panel at the left of the screen.
- In the Fonts window, select the ‘File menu’, and choose ‘Install New Font.’
- Navigate to the folder that contains the fonts you want to install.
- Select the fonts you want to install.
- Press the ‘OK’ button to install the fonts.
Fonts can be installed in several folders in OS X, but we recommend that you do the following:
First, close any open applications. Newly installed fonts may not appear in your font menu if you ignore this step.
Install using Font Book:
- Double click the unzipped font file and Font Book will open a preview of the font.
- Click “Install Font” at the bottom of the preview.
Manually install:
- Open Finder and click the Go menu at the top of the screen.
- While in the Go menu, hold down both the Alt/Option and Shift keys on your keyboard to reveal the hidden link to the Library folder
- Navigate to your Fonts folder:
/Users/Your_Username/Library/Fonts - Drag and drop the unzipped font files into this folder.
OpenType is a cross-platform font file format developed by Adobe and Microsoft. The same OpenType font can be used in both Macintosh and Windows computers.
OpenType feature support lies in the distinction between characters and glyphs. Characters are the code points assigned by the Unicode standard, which represent the smallest semantic units of language, such as letters. Glyphs are the specific forms that those characters can take. One character may correspond to several glyphs; the lowercase “a,” a small cap “a” and an alternate swash lowercase “a” are all the same character, but they are three separate glyphs. One glyph can also represent multiple characters, as in the case of the “ffi” ligature, which corresponds to a sequence of three characters: f, f and i.
OpenType layout features can be used to position or substitute glyphs. For any character, there is a default glyph and positioning behavior. The application of layout features to one or more characters may change the positioning, or substitute a different glyph. For example, the application of the small capitals feature to the “a” would substitute the small cap “a” glyph for the usual lowercase “a” glyph. To access alternate glyphs in an OpenType Pro font, an application provides a user interface that allows end users to apply OpenType layout features to text. Applications that don’t support Unicode or advanced OpenType layout features can still access the basic glyph sets of OpenType Pro fonts, which are analogous to the glyph sets in PostScript Type 1 fonts.
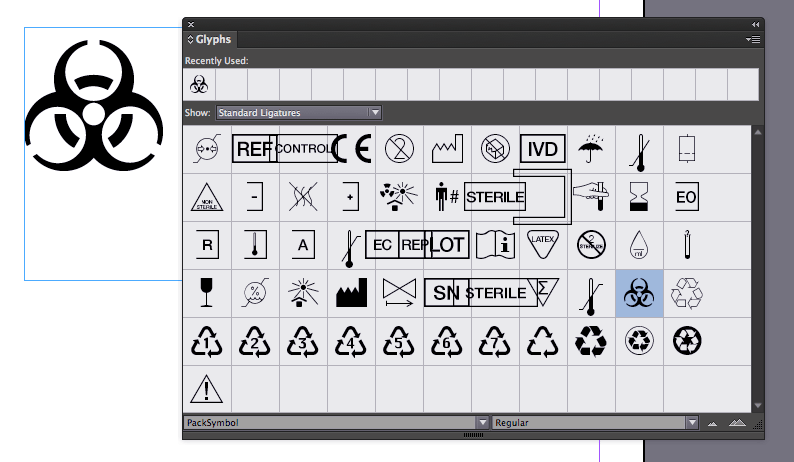
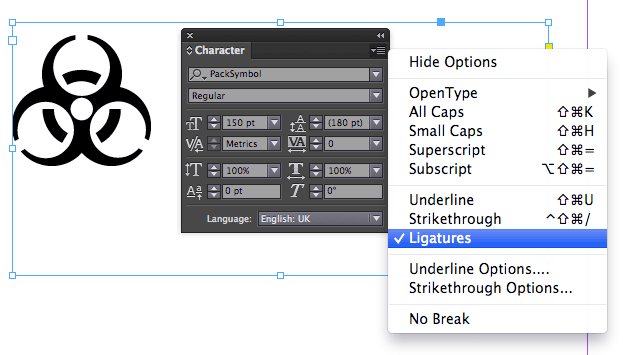
PackSymbol fonts depend on the advanced OpenType features to substitute the required packaging symbol when required keyword is typed in an OpenType supported application, such as InDesign, Illustrator or QuarkXpress. For example for the symbol for Biological Risks is automatically obtained by typing biological risks.
First ensure that ‘Ligatures’ is enabled, then type the keyword for the required packaging symbol.
Alternatively choose the required symbol from the Glyphs pane.